

Building a greenhouse comes down to five design decisions: where it sits and which way the ridge runs, what the frame is made of, what it is glazed with, how it vents and heats, and what it stands on. Get light and ventilation right and almost any modest structure works; get them wrong and no amount of equipment fixes it. This guide is for architects, students and informed homeowners planning a garden greenhouse. It explains each decision with sourced figures, adds a comparison table of glazing options, and includes an annotated section drawing of a well-planned small greenhouse.
A greenhouse is a small exercise in sustainable architecture: it collects free solar heat, loses it quickly through thin glazing, and has to be ventilated so it does not overheat. The same principles of orientation, thermal mass and controlled airflow apply to houses, which is why the greenhouse is still a good teaching model.
Siting and orientation when building a greenhouse
Light is the first constraint when building a greenhouse. The Royal Horticultural Society advises placing a greenhouse where it gets uninterrupted sun throughout the day and sheltering it from cold north and east winds, which hold back spring temperatures. In practice that means keeping it clear of the shadow of the house, hedges and trees, especially in winter, when the sun is low and shadows are long. Check the site at midday in December or January (in the northern hemisphere) rather than in summer.
Which direction should a greenhouse face? There is no single answer, because it depends on what you grow and when. The RHS notes that an east–west ridge gives slightly more winter light, which favours overwintering plants and early sowing, while a north–south ridge suits summer crops such as tomatoes because both sides receive sun, one in the morning and one in the afternoon. At higher latitudes, where winter light is scarce, the east–west ridge is the usual choice; closer to the equator the difference matters less than shading and ventilation.
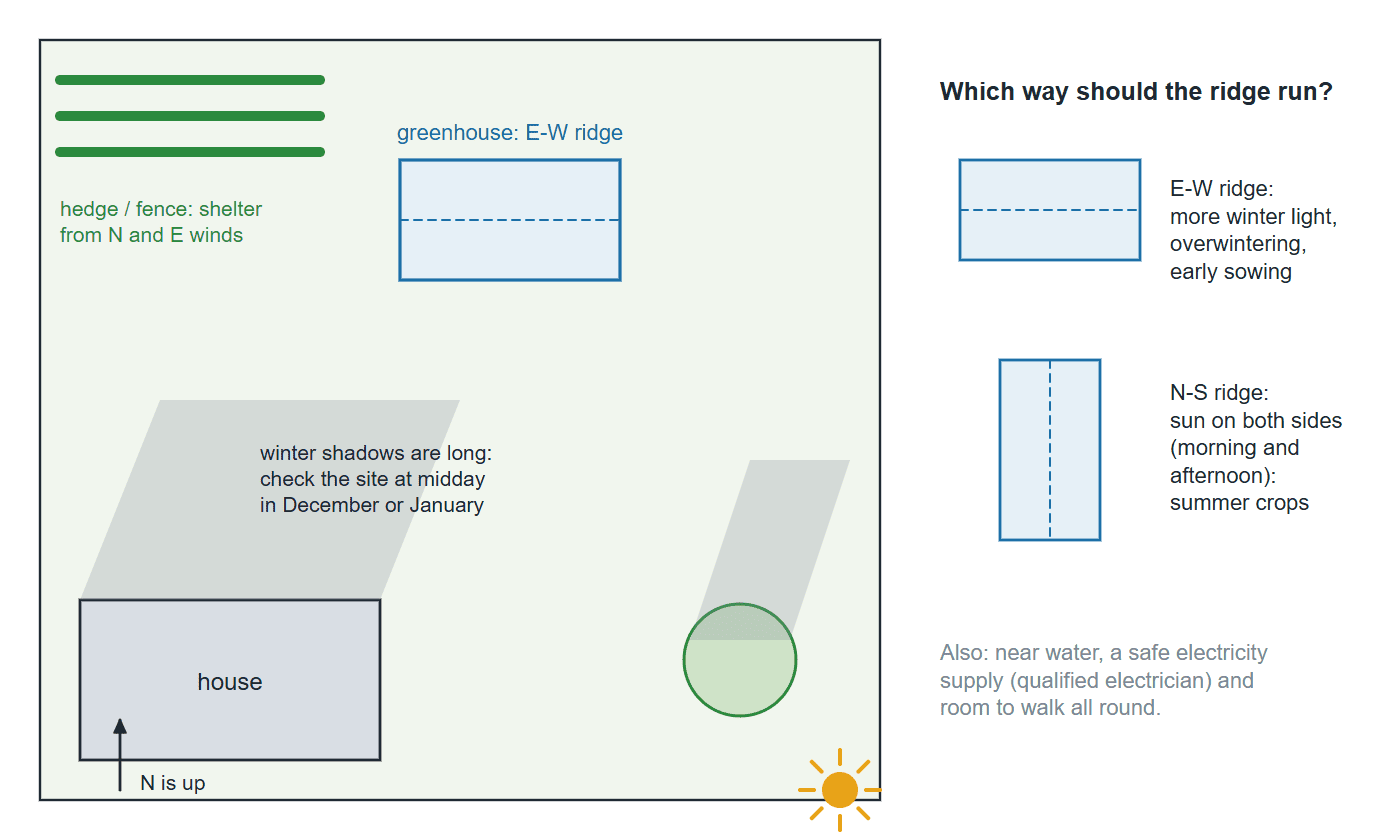
Siting a greenhouse: full sun all day, clear of the winter shadows of the house and trees, and sheltered from cold north and east winds. An east-west ridge gives slightly more winter light; a north-south ridge suits summer crops because both sides get sun (RHS guidance). Diagram: Arch2O
Two practical siting points are often overlooked. Put the greenhouse near a water supply and, if you plan heating or lighting, near a safe electricity supply installed by a qualified electrician. And leave room to walk all round it to clean and replace panes.
Frame materials
In building a greenhouse, the frame decides how much shadow falls on the plants, how much maintenance the structure needs and how long it lasts. The RHS describes aluminium as the usual first choice: it needs no maintenance and its slim glazing bars cast little shade. Timber is the traditional alternative and suits some gardens better visually, but its thicker members cast more shade, and most softwoods need periodic treatment; cedar costs more but needs less care.
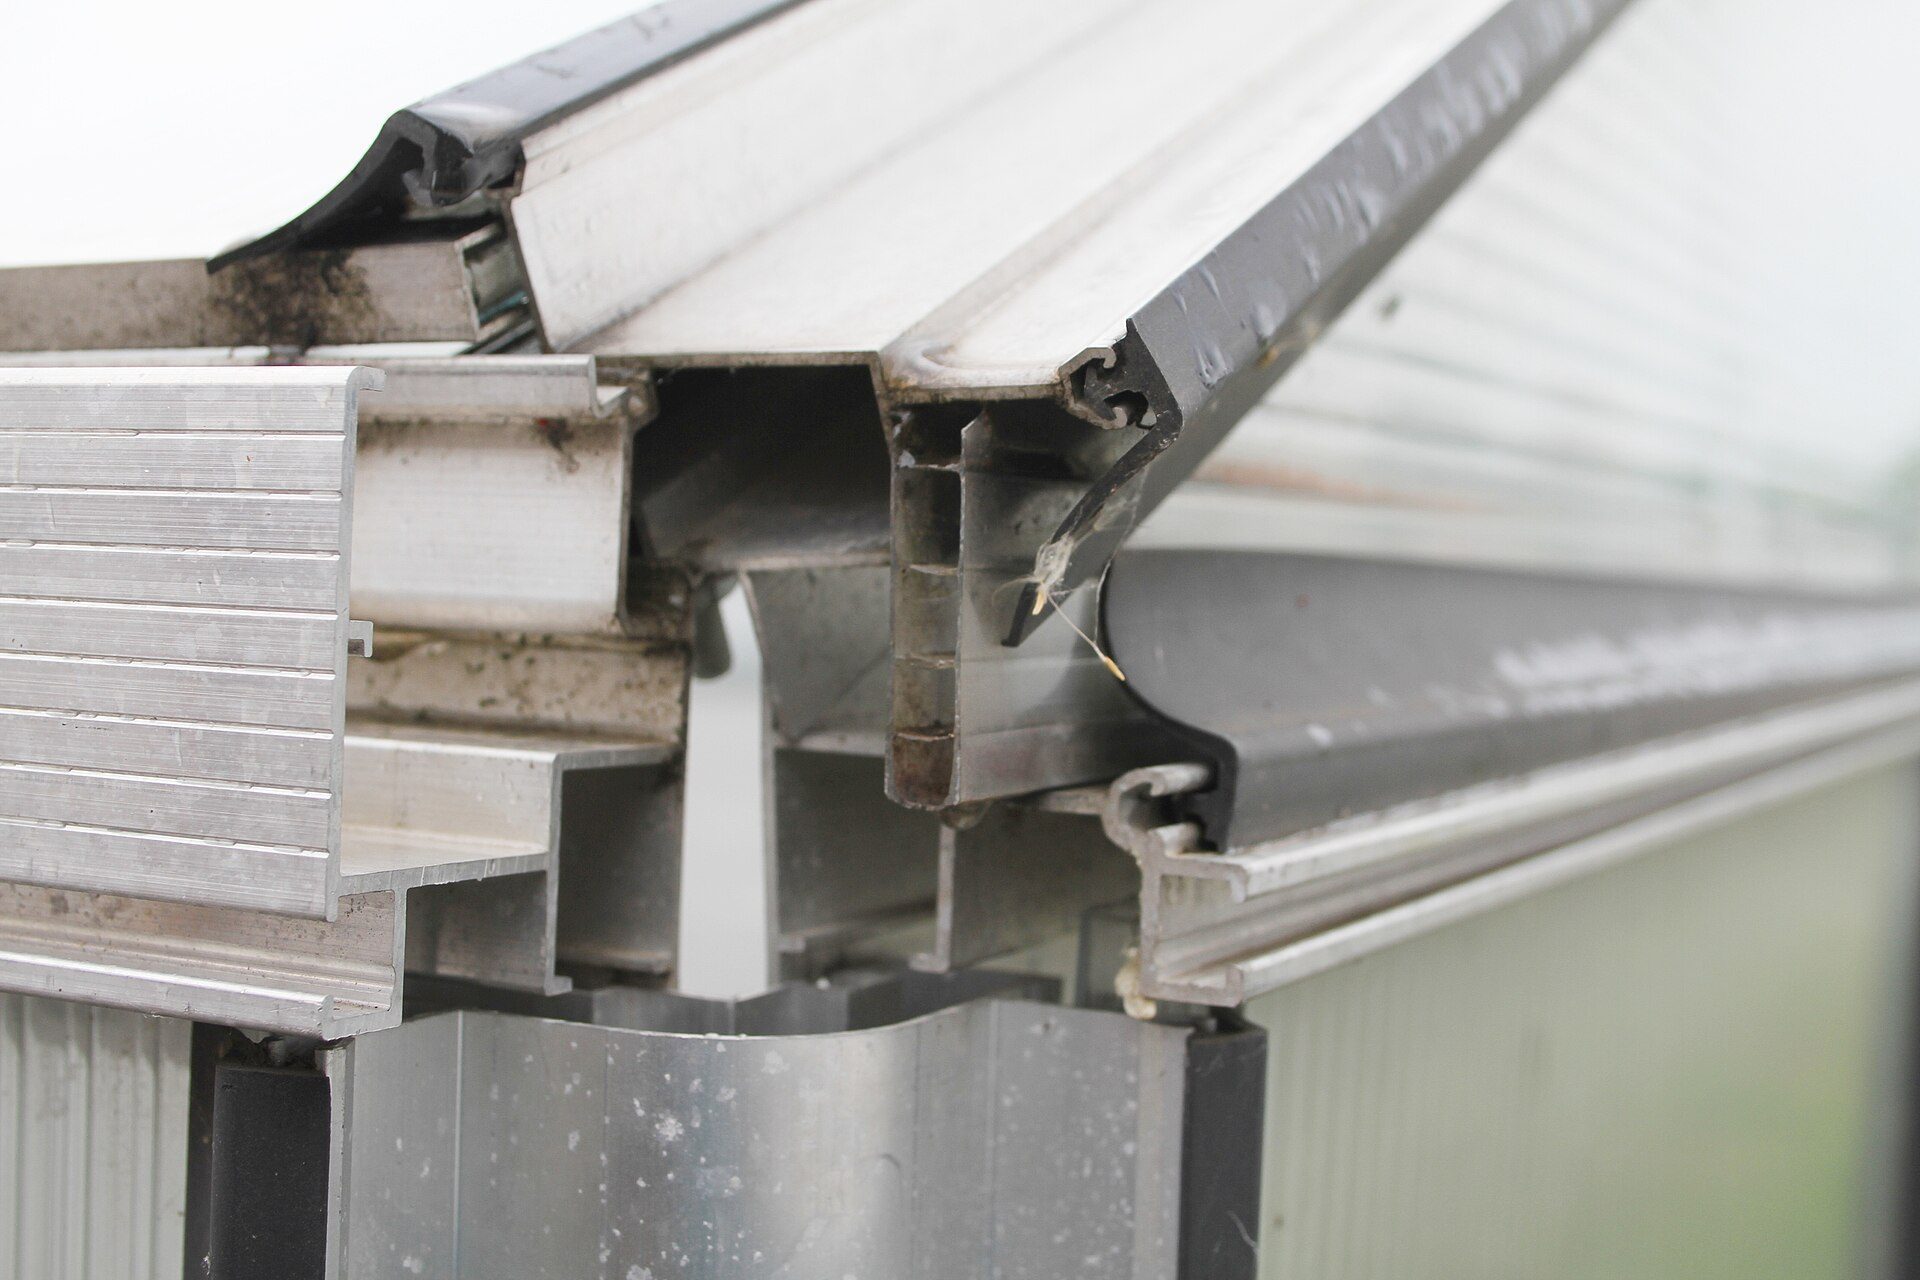
Corner of a small aluminium greenhouse: the slim extruded profile holds the glazing with a rubber seal and casts little shade. Photo: Leo Miregalitheo, CC BY-SA 4.0, via Wikimedia Commons. Leo Miregalitheo, source, CC BY-SA 4.0
Galvanised steel is used for larger and commercial structures and for polytunnel hoops, where its strength allows longer spans. Whatever the material, the frame must be anchored to its base: a light structure clad in thin glazing behaves like a sail in high wind.
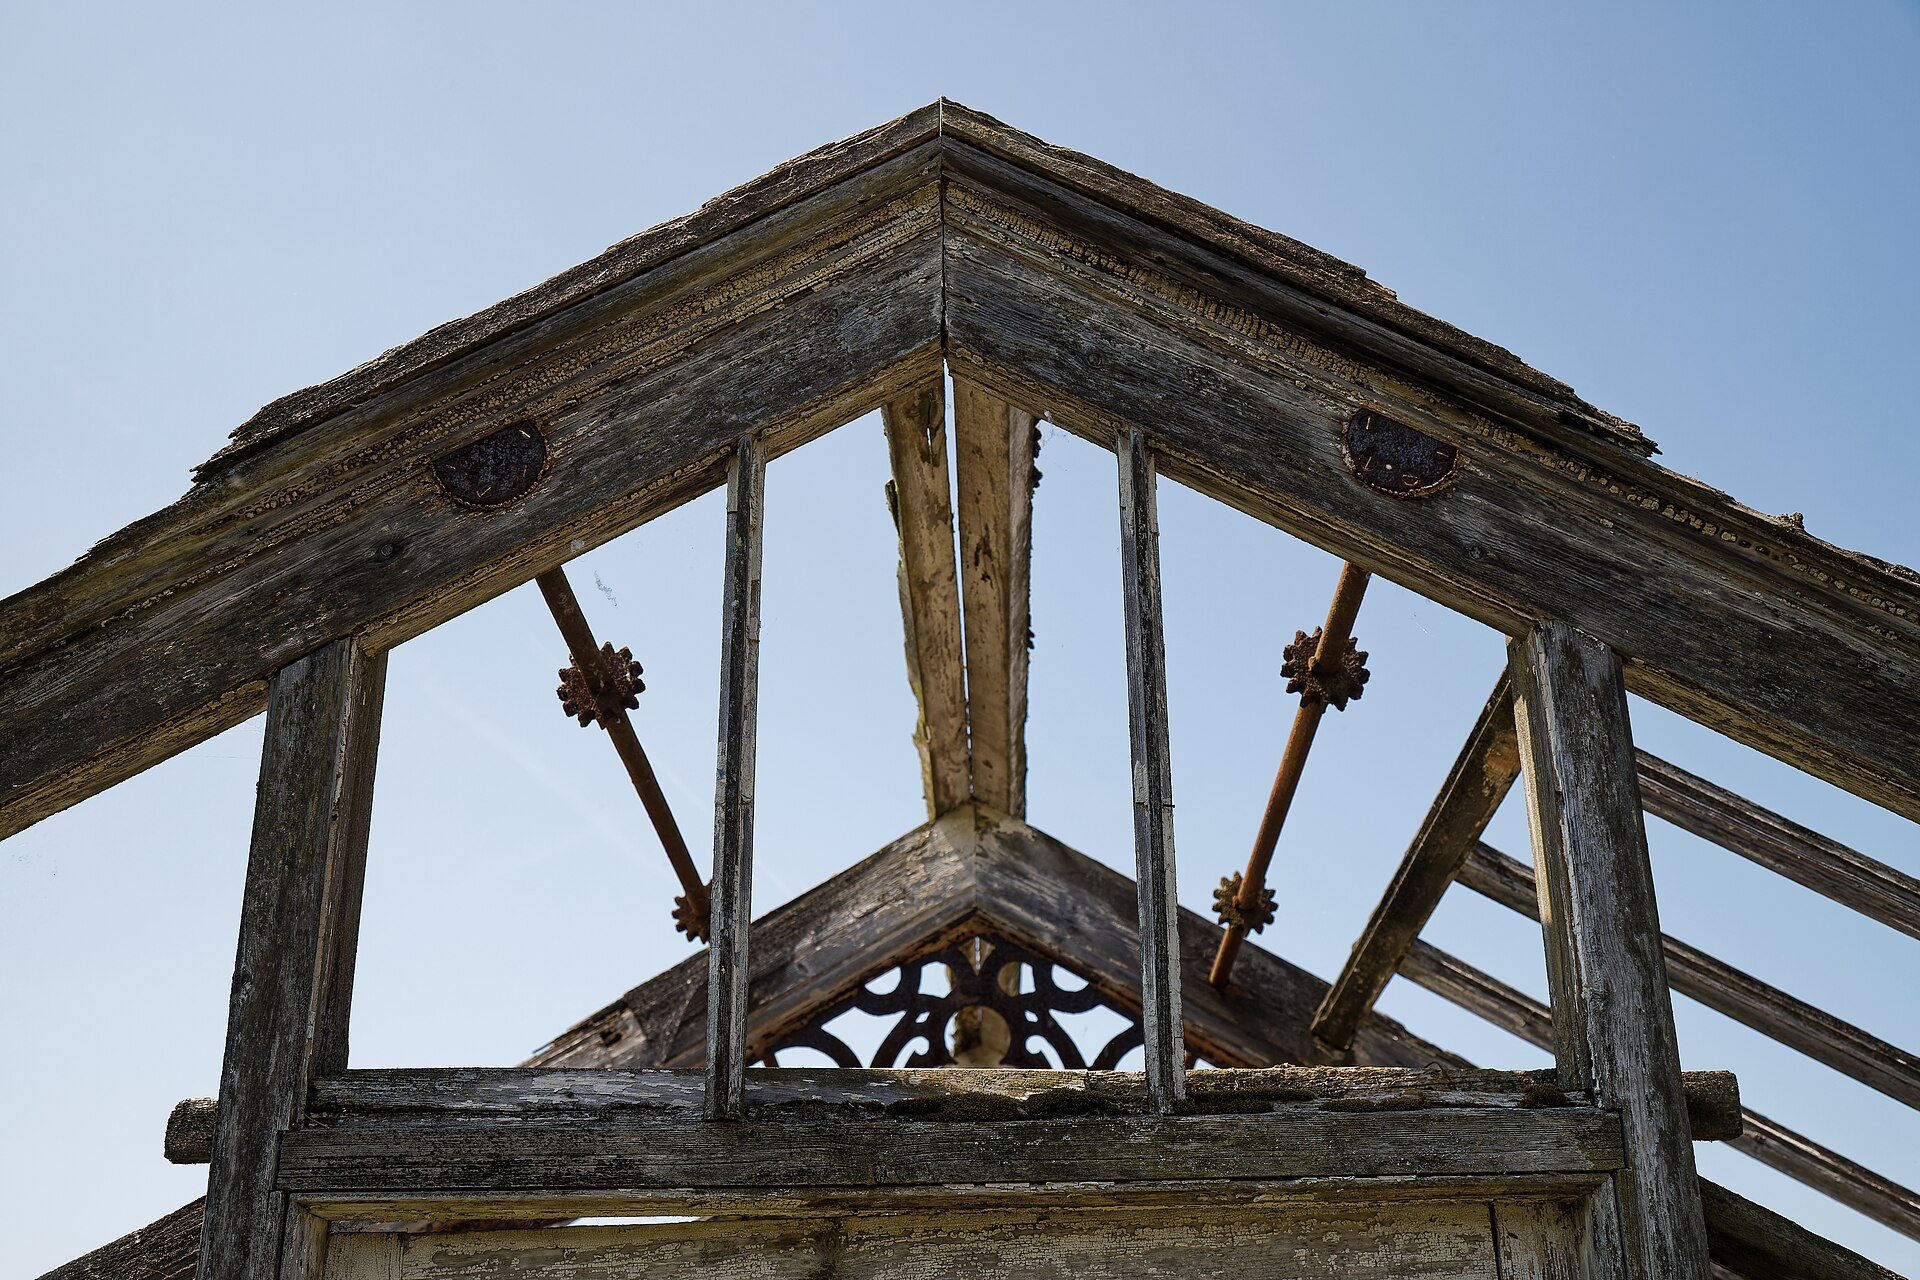
Decayed timber gable of a Victorian hothouse at Copped Hall, Essex: timber frames need regular maintenance or they rot. Photo: Acabashi, CC BY-SA 4.0, via Wikimedia Commons. Acabashi, source, CC BY-SA 4.0
Glazing: glass vs polycarbonate
Is glass or polycarbonate better for building a greenhouse? For light, glass wins. The RHS gives 90 per cent light transmission for glass, 83 per cent for clear polycarbonate and 85 per cent for twin-walled acrylic, and notes that glass does not degrade in sunlight. Twin-walled polycarbonate is lighter, harder to break and insulates better because of the air layer between its walls, which is why it is common on school and allotment greenhouses and on very exposed sites. Acrylic transmits well but is brittle and can crack during installation.
| Glazing | Light transmission | Strengths | Limits |
|---|---|---|---|
| Glass (horticultural or toughened) | About 90% | Most light; does not degrade in sunlight | Breakable; use toughened glass in doors and low panels |
| Twin-wall polycarbonate | Clear polycarbonate about 83% | Light, hard to break, better insulation | Less light; can scratch and discolour over time |
| Twin-wall acrylic | About 85% | Good light, insulates | Brittle; can crack during installation |
Source: Royal Horticultural Society, Greenhouses: choosing (accessed 28 October 2026) (as of 28 October 2026).
Safety matters as much as light. Use toughened glass in doors and anywhere someone could fall against a pane, as the RHS recommends, and consider polycarbonate for low-level panels where children play nearby.
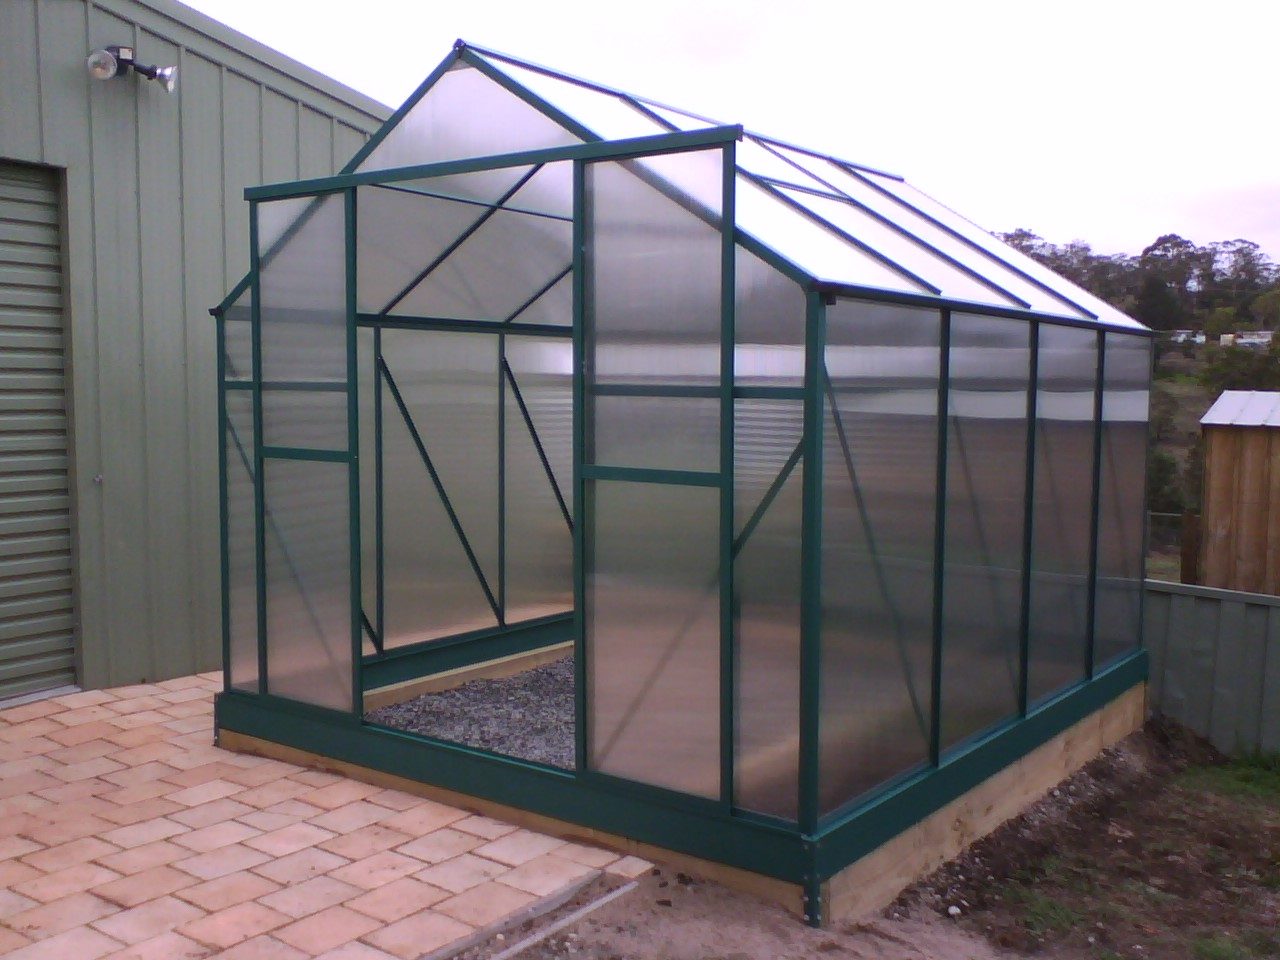
A metal-framed greenhouse clad in polycarbonate, set on a paved base: lighter and tougher than glass but transmitting less light. Photo: public domain, via Wikimedia Commons. Image: Myself (Public domain (verified))
Ventilation and heating
On a sunny day a closed greenhouse overheats within hours, even in a cool climate, so ventilation is not optional in building a greenhouse. The RHS recommends roof vents on both sides of the ridge with a total opening equivalent to 15–20 per cent of the floor area, and says side vents cannot replace roof ventilation. Warm air rises and leaves through the ridge while cooler air enters lower down, a simple stack effect that works without power. For a 2.4 × 1.8 m (8 × 6 ft) greenhouse, with a floor area of about 4.3 m², 15–20 per cent means roughly 0.65–0.9 m² of opening.
Hot climates need more. Agricultural engineering guidance in the United States recommends matching the sidewall vent area to the ridge vent area, each at 15–20 per cent of the floor area, with more in warmer regions, and Australian state guidance suggests well above that for all but the coolest areas. Where natural ventilation cannot keep up, add shading in summer and an extractor fan sized by the supplier for the greenhouse volume. Automatic vent openers, which use a wax-filled cylinder that expands with heat, open the vents without electricity and are worth fitting on any unattended greenhouse.
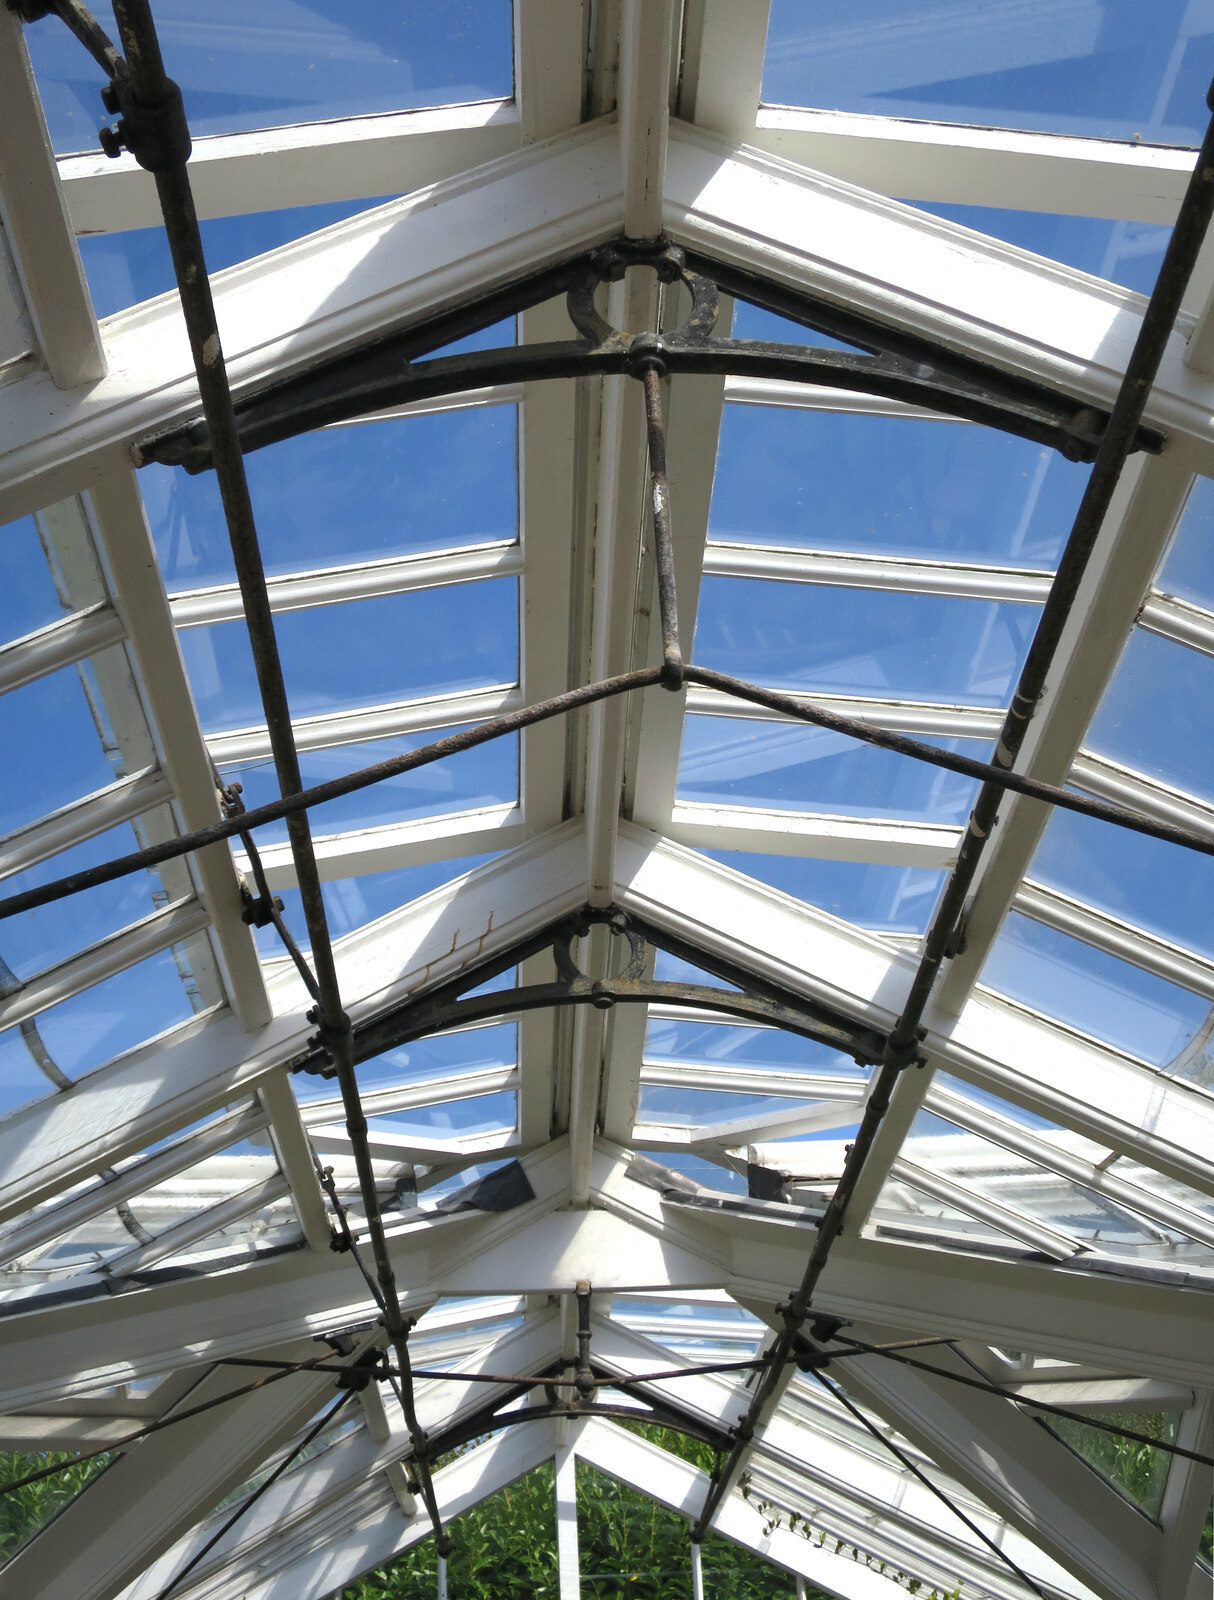
Hinged roof vents along the ridge of a glasshouse let warm air escape at the highest point. Photo: Dave Croker, CC BY-SA 2.0, via geograph.org.uk and Wikimedia Commons. Dave Croker, source, CC BY-SA 2.0
Heating is a matter of what you want to keep alive. An unheated glass greenhouse extends the season but will still freeze in a hard winter. To overwinter tender plants you need a heat source with a thermostat, and every heater that burns fuel, such as paraffin or gas, also releases moisture and needs some ventilation. Insulating the glazing with bubble film in winter cuts heat loss but also cuts light, so use it only for the cold months. Thermal mass helps too: a brick dwarf wall, a solid floor or water containers store daytime heat and release it at night, the same idea as passive solar design in houses.
Foundations and floors
Building a greenhouse rarely needs deep foundations, because the frame is light, but it does need a base that is level, square and fixed. Small kit greenhouses on bare soil tend to move as the ground settles, which twists the frame and can crack panes. A UK supplier’s buyer guide notes that soil is rarely flat enough to build a square frame on and that larger greenhouses may subside on it, and it recommends flagstones or a concrete or brick perimeter instead.
There are three common options. A paved base of flagstones on a compacted, levelled bed is easy to anchor to and drains through the joints. A concrete slab is the most stable and takes expanding anchor bolts, but water can pool on it unless you add falls or a drain. A perimeter base, either a concrete strip or a brick dwarf wall, leaves the soil inside open for beds while giving the frame something solid to bolt to; brickwork has to follow the manufacturer’s base plan exactly, because the sills sit on it. In every case build the base slightly above the surrounding ground so water runs away, and use the actual dimensions from the supplier, which are usually a little larger than the nominal size.
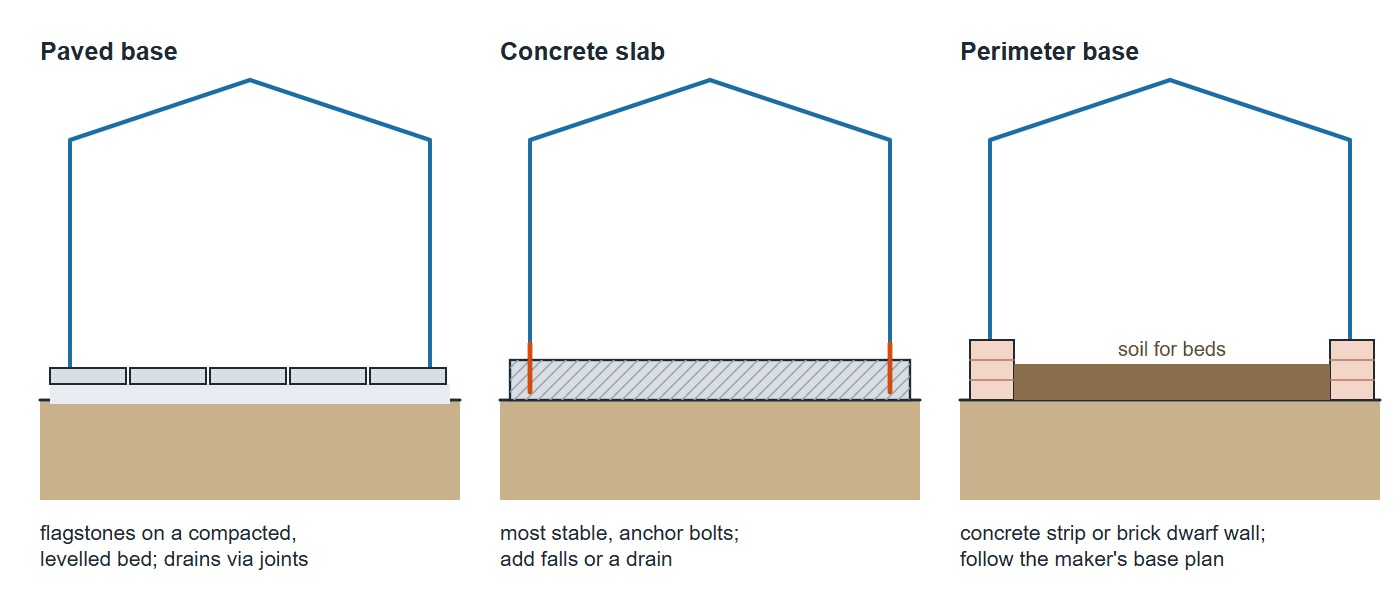
Three greenhouse bases: flagstones on a compacted, levelled bed (easy to anchor, drains through the joints), a concrete slab (most stable, takes expanding anchors, needs falls or a drain), or a perimeter strip or brick dwarf wall that leaves soil inside for beds. Each sits slightly above the surrounding ground. Diagram: Arch2O
Permits
Whether building a greenhouse needs permission depends on where you live. In England, greenhouses are treated as outbuildings for planning. Under permitted development they must be single storey, with eaves no higher than 2.5 m and an overall height of no more than 4 m with a dual-pitched roof or 3 m otherwise; within 2 m of a boundary the whole structure is limited to 2.5 m, and outbuildings must not cover more than half the land around the original house. The Planning Portal lists these limits and the exceptions: listed buildings, flats, designated land and areas with an Article 4 Direction need permission. For building regulations, a greenhouse is exempt under Schedule 2 of the Building Regulations 2010 unless it is used mainly for retailing, packing or exhibiting.
In the United States, rules are set by each local authority. Many adopt the International Residential Code, whose section R105.2 exempts one-storey detached accessory structures up to 200 sq ft (about 18.6 m²) from a building permit, but local amendments change the threshold, setbacks and height limits still apply, and electrical, plumbing or heating work usually needs its own permit. Elsewhere, check with the local planning or building authority before ordering a kit, and check any homeowners’ association or lease rules.
Decision summary
Before building a greenhouse, settle the order of decisions: find the sunniest unshaded spot and choose the ridge direction for the season you care about; pick a slim aluminium frame unless appearance or budget says timber; glaze with glass for light or twin-wall polycarbonate for safety and insulation; size roof vents at 15–20 per cent of the floor area in a temperate climate and more in a hot one; and put the frame on a level, anchored base. Then confirm the local planning and building rules. The next step is to sketch the plan at 1:50 with the vent positions and the sun path for midwinter, which will show whether your site works before you spend anything.

Sophie Tremblay is a Montreal-based architectural editor and designer with a focus on sustainable urban development. A McGill University architecture graduate, she began her career in adaptive reuse, blending modern design with historical structures. As a Project Editor at Arch2O, she curates stories that connect traditional practice with forward-thinking design. Her writing highlights architecture's role in community engagement and social impact. Sophie has contributed to Canadian Architect and continues to collaborate with local studios on community-driven projects throughout Quebec, maintaining a hands-on approach that informs both her design sensibility and editorial perspective.