what is an architecture model?
Being an architecture student and a future architect requires multiple skills, one of which model-making. Architectural models are an excellent way to present a 3D version of your architectural, interior, or urban design project.
They give you a sense of how the elements will feel in reality combined. Besides, they are easier to perceive for other viewers, especially those without experience in architecture.
Architecture Model Tips:
So, here we will give you tips on how to go about your architecture model to make it the best it can get. We will discuss the scale, the tools, the sequence, and the aesthetic presentation. We will also give you some budget-saving tricks. So, let’s get started:
1. What will you be modeling?
First, you need to comprehend the nature and size of the project you will be modeling. If the idea is mainly in the form, then you need to focus on the base material that will best show your form, regardless of how it shall look from the inside. Some other projects, like houses, may require an architecture model showing the facades’ design and the inside layout. So, here you will be dealing with more details.
For example, if it is a model for an apartment, then the inside is all that matters. Urban design models are a completely different case. You will be modeling entire neighborhoods, so the level of detail required for the architectural elements in the model is much less.
Also read: 14 of the Most Foreseen Architecture Projects to Keep an Eye on in 2023
Pinwheel. ©baldridgeArchitects
2. What scale is used in most architectural models?
Here is a guide for you on how the scale works with models. Generally speaking, architectural models range from 1:10 to 1:200 mostly, while urban models range mostly between 1:500 and 1:2500, depending on what the model will be covering.
Reference book: Basics Architecture 01: Representational Techniques
3. What are the suitable materials to use?
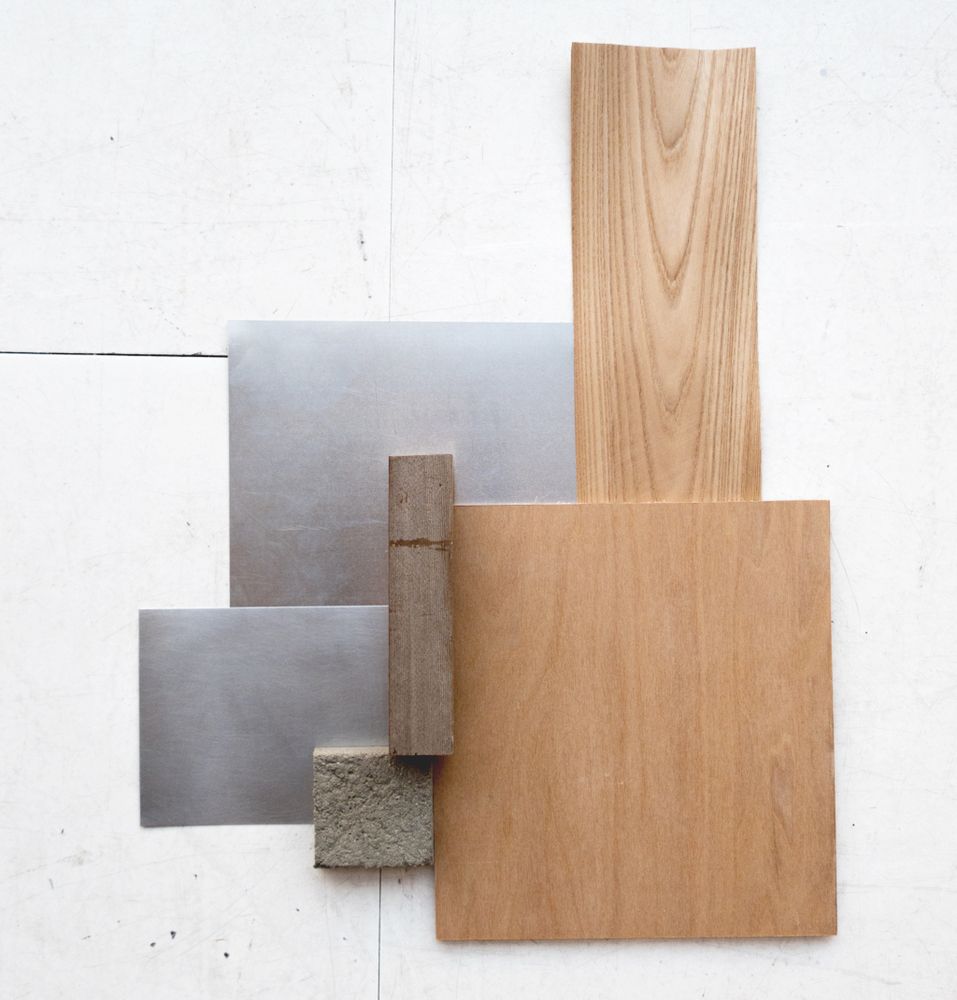
©Fruzsi Boutros
We have a wide range of materials here depending on your purpose, available time, and level of expertise. Foam is an architecture model’s primary and most commonly used base material.
• White Foam boards
come in multiple thicknesses, but most commonly, 3mm and 5mm. These solid boards can be used as a base for models created from foam and other light materials. You can also use them to construct walls and choose the thickness based on the scale. If the interior wall is not visible, then the consistency doesn’t matter.
• Cork sheets
These are textured brownish sheets that are less thick and more flexible than foam boards. They are easier to handle and cut, but they can break easily.
• Foam sheets
Foam sheets are flexible but not easily breakable. They come in colors and small thicknesses; they can be cut easily with scissors.
• Wood
Wood can be used for modeling, especially Balsa wood which can be cut easily and painted. Wooden boards can also be used as a base for heavier models. Balsa strips can be used for structures with wooden skeletons or to show trusses.
Suppose your model is more of a conceptual or a form-oriented type. In that case, you can go for materials that can be easily shaped, like heavy Canson sheets, paper, wires, or clay, and if you have the patience, you can experiment with gypsum or paper mâché.
Also read:- Sketchup plugins free download.
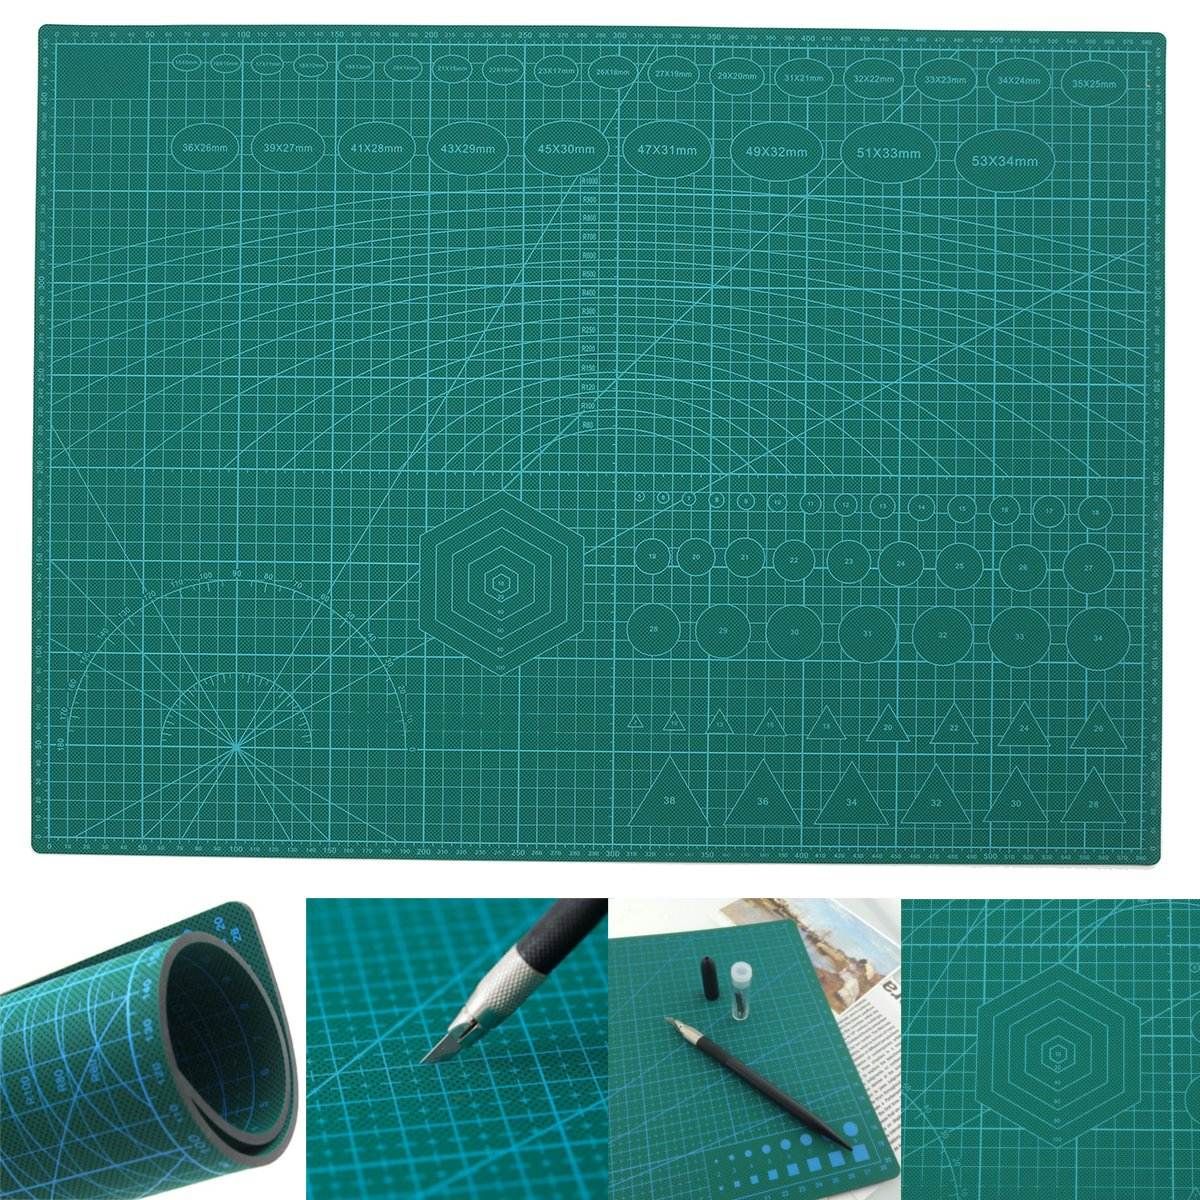
4. What are the right tools to use for cutting and assembly?
First, the cutting:
Cutting is the first step of model making, and it is not an exaggeration when we say it can make or break it. Neatly cut pieces give an overall aesthetically pleasing understandable architecture model. If the edges are messy, the model might not be perceived well. To ensure clear-cut edges, you need to use the following:
• Fresh blades: Stainless steel wheel-locked utility knives with replaceable blades are best for neat cuts. The changeable blade size also makes cutting more manageable and better.
• Precision knives: They are very sharp, durable, and easy to maintain. They are best used for small details. They can easily cut through paper, foam, fabric, thin metal, and plastic.
• Scissors: Small titanium scissors are needed for fine details. Be careful to buy ones with a comfortable grip, so they will not hurt with extended use.
• L-Square: Stainless steel L-squares help you draw perpendicular lines quickly and accurately. Attaching masking tape to its back make it hold better to the material below and avoids sliding.
• Metal Ruler: 6″, 12″, and 18″ metal rulers can all be handy depending on the model’s size. These are best for cutting.
• Self-healing Cutting Mat: They will protect the cutting blades from dulling fast; you don’t want to ruin your desk.
• Laser Cutting: If you are not confident in your cutting or willing to pay more, you can take that shortcut. You draw the sample pieces on AutoCAD, and the laser cutter will do the rest.
Also read:- the most iconic buildings of modern architecture
Tip 1: Be careful not to cut yourself, especially with the precision knife, and keep the first-aid kit by your side.
Tip 2: Make prototypes for all the different pieces and then use them as templates. It makes cutting much easier and faster.
Tip 3: Before going for laser-cutting, try to do the manual work and get a sense of it. It is an irreplaceable experience.
Second, the assembling:
Now that you have all the pieces cut and ready, you need to know the best assembly tools. So, here is what you might need, and, of course, depending on the materials, time, and budget, you can decide.
• Glue Sticks: They are cheap and easy to use but not very strong. They only work with paper and might not give you a permanent result.
• White Glue: Non-toxic white glue products stick materials firmly and neatly. However, it takes a while to dry.
• Tacky Glue: It is like white glue but thicker, so it’s stronger than standard white glue and dries faster.
• Hot Glue: It dries the fastest and gives a strong bond. However, you must be cautious since the hot glue can burn you. Also, you can’t afford to make mistakes since it dries fast and firmly. Finally, glue guns tend to have a short lifespan. They break easily and need to be replaced.
• Wood Glue: Obviously, you will need that if your model will make of wood. You need to clean the excess glue immediately because it stains.
• Double-sided Tape: This tape sticks on both sides. It is robust, neat, and adjustable, but be careful when placing it because if you try to remove it after, it will tear away the paper or the foam board surface.
• Glue Syringe: When using glue, these could be very handy. You can fill them with white or tacky glue and use them on the spot. Your architecture model will come out neat and stable.
Tip: While the glue is set, you can temporarily use straight pins to hold the pieces together.
Now, it is time to discuss the presentation.
5. What to use for finishing materials in your architecture model?
This step might require a bit of creativity on your side. After all, a large variety of materials can be represented differently. However, the most common way to express the finishing material is to:

©Tim Viktorsson
• Print bitmaps of the tiles or bricks in the correct scale and measurements and stick them accurately to your foam board walls.
• Instead of printing, buy from the available variety.
• Corrugated paper sheets can be used for roofs. They can also be used for some wall finishes.
• Thin transparent plastic sheets, also known as clear sheet print, can indicate glass.
• Balsa wood strips can be used for wooden screens and other wooden finishes.
• The brownish color of the cork sheets might also give a general impression of wood.
• For colored surfaces, you can paint the paper or foam board with color sprays.
• You can also use colored sticker paper, which is available in craft shops.
• If there is too much of a specific color, you can buy colored foam boards. The filling is white, but the smooth surface is colored.
Tip: Don’t overdo it. Think carefully about what you would like to reflect on your architecture model. Too many materials, especially stickers with no texture, will look artificial. Just show what is essential. Now, let’s tweak the model with furniture and some landscape elements.
Also read:- best secret room ideas.
6. How to furnish and landscape your architecture model?
Starting with the furniture:
You can buy the ready-made stuff, but they can be a bit pricey, and if you would like to show your own designed or customized furniture, they won’t do. So, you can start making your furniture.
• Clay is one of your best options because it is easy to shape and handle, and besides, it is cheap.
• Small thickness (1mm) foam boards can also be used and colored.
• Colored foam sheets are a good option since they are easy to handle. Use a thickness that will make it stand.
Now, to the landscaping:
Here we have flooring, vegetation, water elements, and lighting fixtures.
As for the flooring:
• Flooring tiles, just like with finishing materials, can be bought or printed.
• Roads with white markings can be drawn, or you can buy the ready-made strips
• The height of the pavements or sidewalks can be shown by a layer of thin foam board or according to scale.
• Water elements include pools and fountains;
– For water, you can use blue paper sheets and cover them with thin transparent textured plastic sheets or just clear sheet print if it is a small surface.
– For the fountain, you can model it as a piece of furniture with the same suggested materials.
Vegetation includes trees, shrubs, and grass. You can:
• Buy the ready-made small grass mats, trees, and tufts.
• Use actual moss for grass indication.
• Spray sawdust with grass-green color and make your moss.
• As for trees, the skeleton or the trunk part can be made of: wire, toothpicks, or straight pins.
• The green mass can be made of green-colored cotton pads, cork balls, sponges, or foam.
Check this tutorial on how to make wire trees; you will get the idea:
As for the lighting elements, you can use the following:
• White-headed straight pins
And if you want actually to illuminate your model, you can use the following:
• Micro LEDs
• Tiny glow sticks
Types of Architectural Design Models:
Architectural design is an artistic medium. A picture says a thousand words, but a well-crafted 3D Architecture Model says a million. It integrates spatial awareness, location specificity, and materiality.
Creating architecture models is crucial for architects of all experience levels to effectively explain their designs to clients, colleagues, and the general public, the latter of whom may lack the technical knowledge necessary to interpret blueprints.
1) Conceptual Design Models

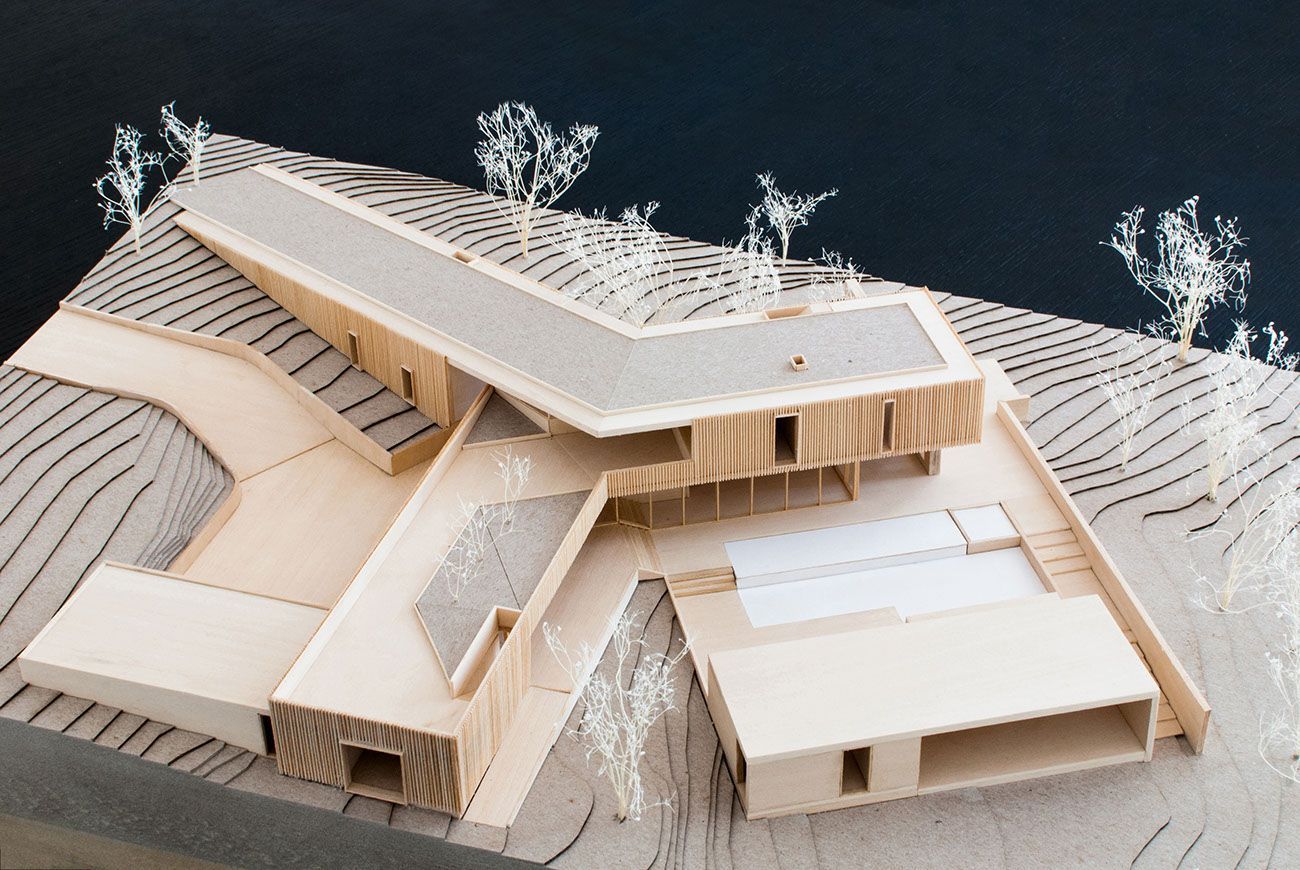
©Model Residence
Visualizing the design’s preliminary form and shape might be beneficial throughout the brainstorming phase. While most designers begin with a 2D drawing, a simple model may provide valuable insight during the planning stage. Cost-effective materials like balsa wood or foam may be used to assemble conceptual models swiftly.
2) Working Models
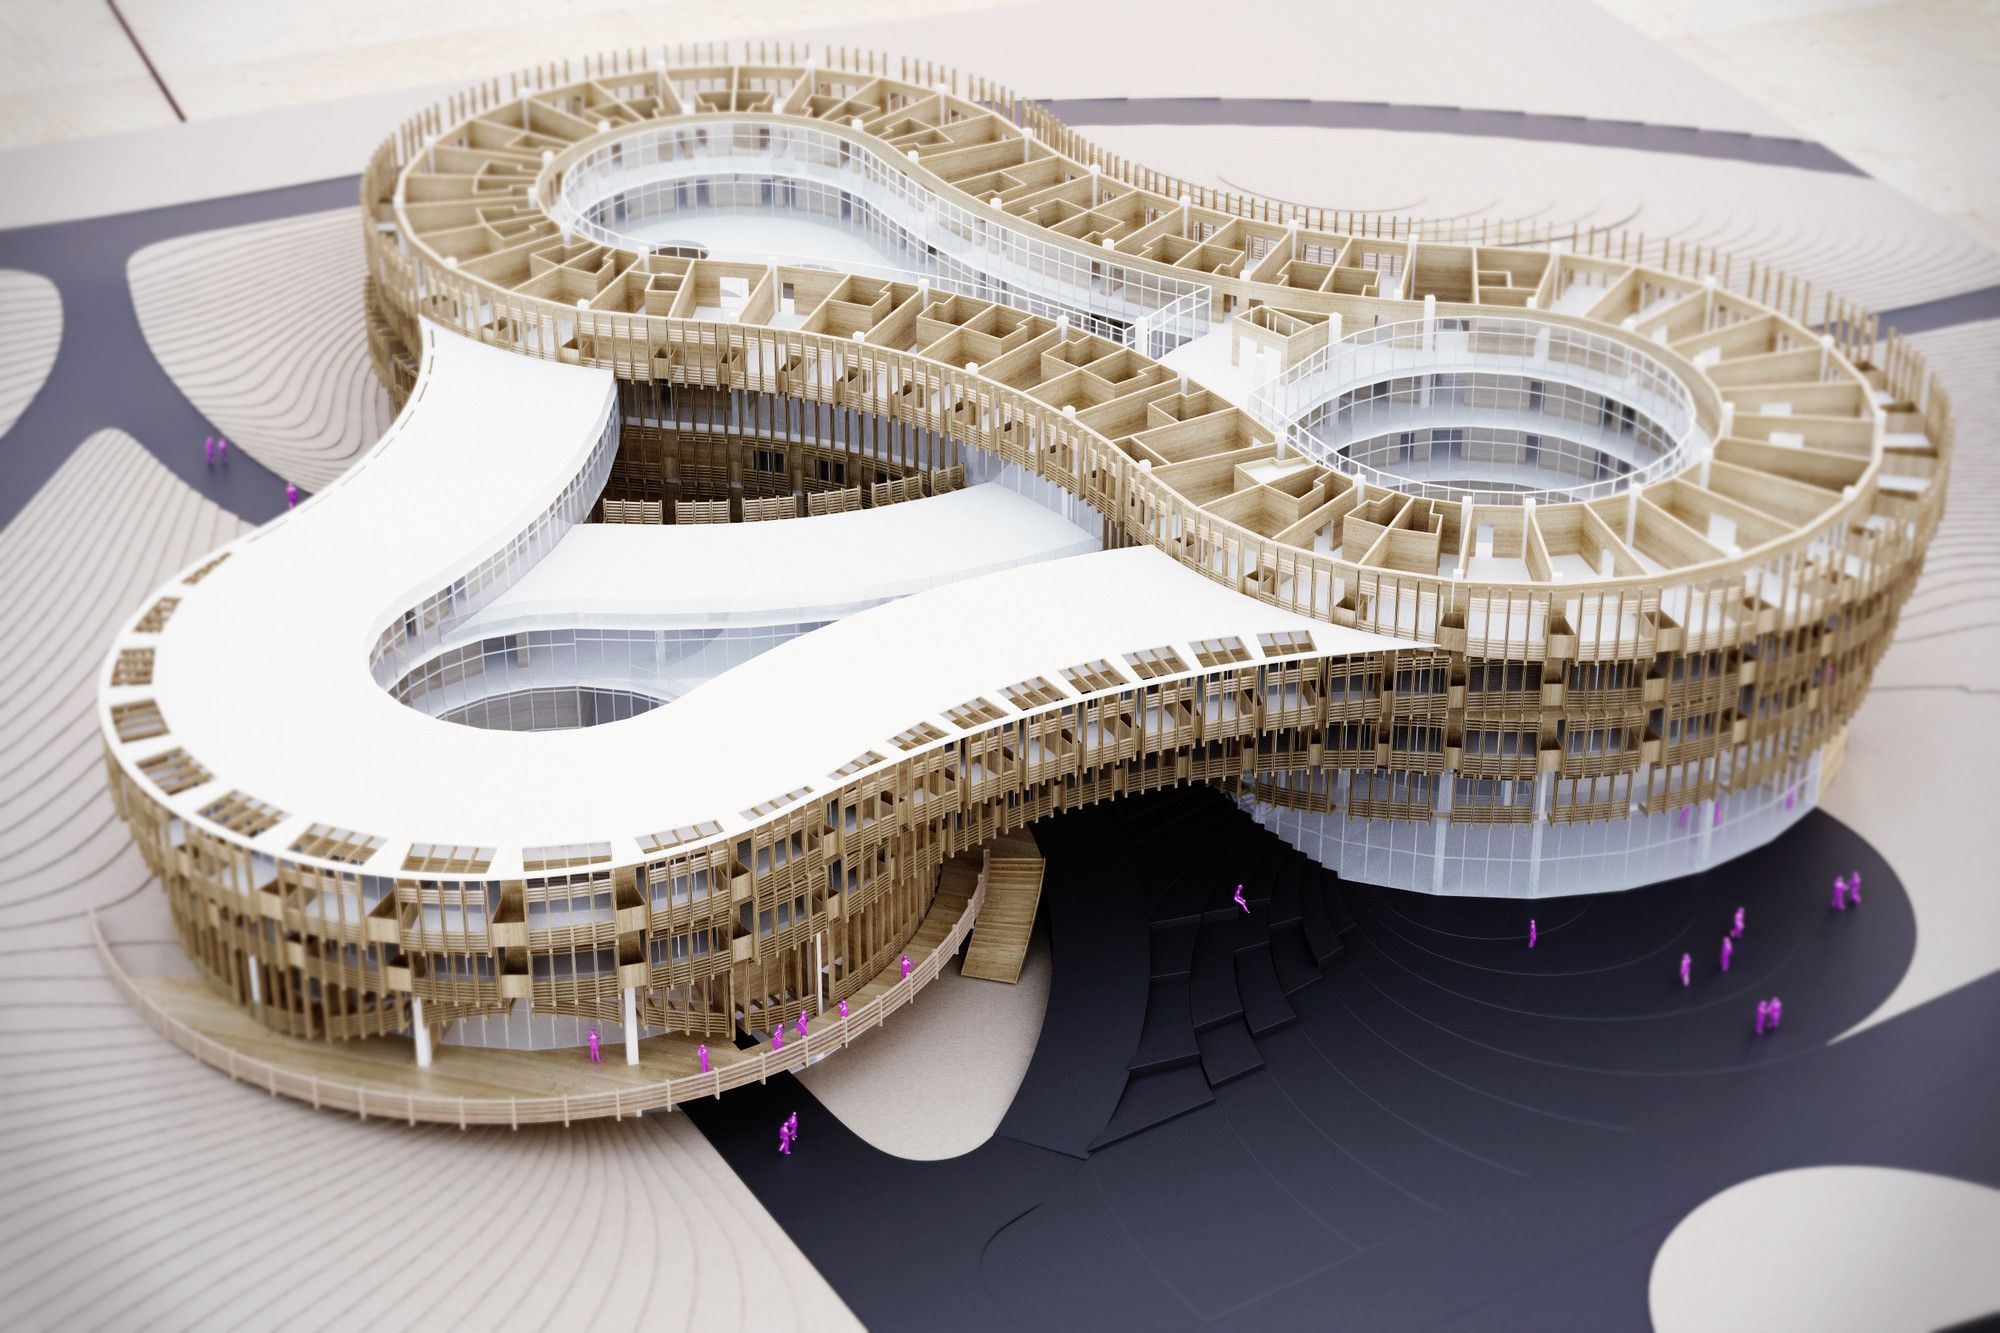
©GRAFT + penda
You may transform your conceptual model into a functional prototype if you have a clearer picture of the final product. Building a design model will show you how to fix problems and maybe even suggest new, unique solutions if you’ve encountered issues with your preliminary design. Model builders typically use firmer materials like wood, concrete, and metal to construct working models.
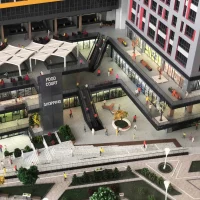
3) Presentation Models
If you want to show potential investors or clients your final product, you’d like to use a concept presentation model to help you express your model effectively. The best presentation models are produced using high-quality materials like resin or even a 3D printer.
-
- ©Marmara Models
-
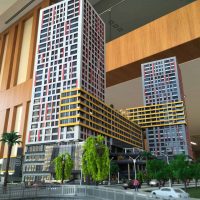
- ©Marmara Models
-
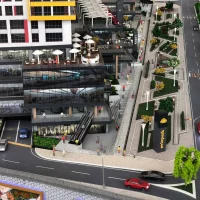
- ©Marmara Models
Finally, here are some general tips that will help you with your architecture model-making:
• Wash your hands frequently so you do not stain your model or your hands.
• Make sure to work in an ample enough space to move freely.
• Work in good lighting conditions so as not to hurt your eyes or make mistakes.
• Print your plans and use them as a base for your model to build it faster.
• Invest in high-quality tools since they will live longer and give you the best outcome.
• Enjoy the process. It will reflect on your work.
Happy modeling!